- How can I decorate my kitchen for Halloween without cluttering the counters?
Focus on vertical decorating. Use walls, cabinet doors, open shelves, windows, refrigerators, and the space above your cabinets. Seasonal towels, artwork, wreaths, and removable decorations can also create a Halloween look without taking up valuable counter space.
- What colors work best for Halloween kitchen decor?
Classic black and orange work well, but you can create a more sophisticated look with cream, warm wood, burnt orange, deep green, brown, charcoal, or brass. Choose two or three colors and repeat them throughout the room for a cohesive result.
- How do I decorate a small kitchen for Halloween?
Small kitchens benefit from vertical and removable decorations. Try wall art, cabinet accents, window silhouettes, refrigerator magnets, open-shelf styling, seasonal towels, and small hanging wreaths. Avoid filling the counters with lots of individual decorations.
- Can I decorate my kitchen cabinets for Halloween?
Absolutely. Add lightweight ribbons, miniature wreaths, bats, small ornaments, or removable decals to cabinet doors and handles. Keep decorations lightweight and make sure they do not interfere with opening or closing the cabinets.
- How can I make Halloween kitchen decor look more expensive?
Use a limited color palette and fewer, larger pieces instead of lots of tiny decorations. Warm lighting, natural materials, dark ceramics, wood, brass, and cohesive textiles can create a more polished appearance without requiring an expensive Halloween collection.
- What Halloween decorations work best for renters?
Renters can use removable hooks, temporary decals, magnetic decorations, lightweight wreaths, window clings, and seasonal textiles. Always check the manufacturer's instructions before attaching anything to painted walls, cabinets, or other surfaces.
- How do I keep Halloween decorations from interfering with cooking?
Create dedicated decorating zones and keep frequently used work areas clear. Avoid placing loose or flammable decorations near the stove, oven, sink, or food preparation surfaces. If a decoration constantly gets in your way, move it somewhere else. A pretty kitchen should still let you make dinner without fighting a ceramic ghost for counter space.
How to Give Your Kitchen a Halloween Makeover Without Losing Counter Space
Halloween decor and kitchen counter space do not exactly get along. Add a few pumpkins, spooky signs, candles, jars, and cute little ghosts, and suddenly your coffee maker has nowhere to live.
But you can absolutely give your kitchen a Halloween makeover without sacrificing the workspace you actually use. The trick involves moving your decor upward, outward, and into places you probably ignore the rest of the year.
I love kitchen decor that looks festive without turning the room into a Halloween store exploded overnight. So, let’s keep the counters functional, keep the cooking area practical, and still make the kitchen feel properly spooky.
Start With a Halloween Color Palette
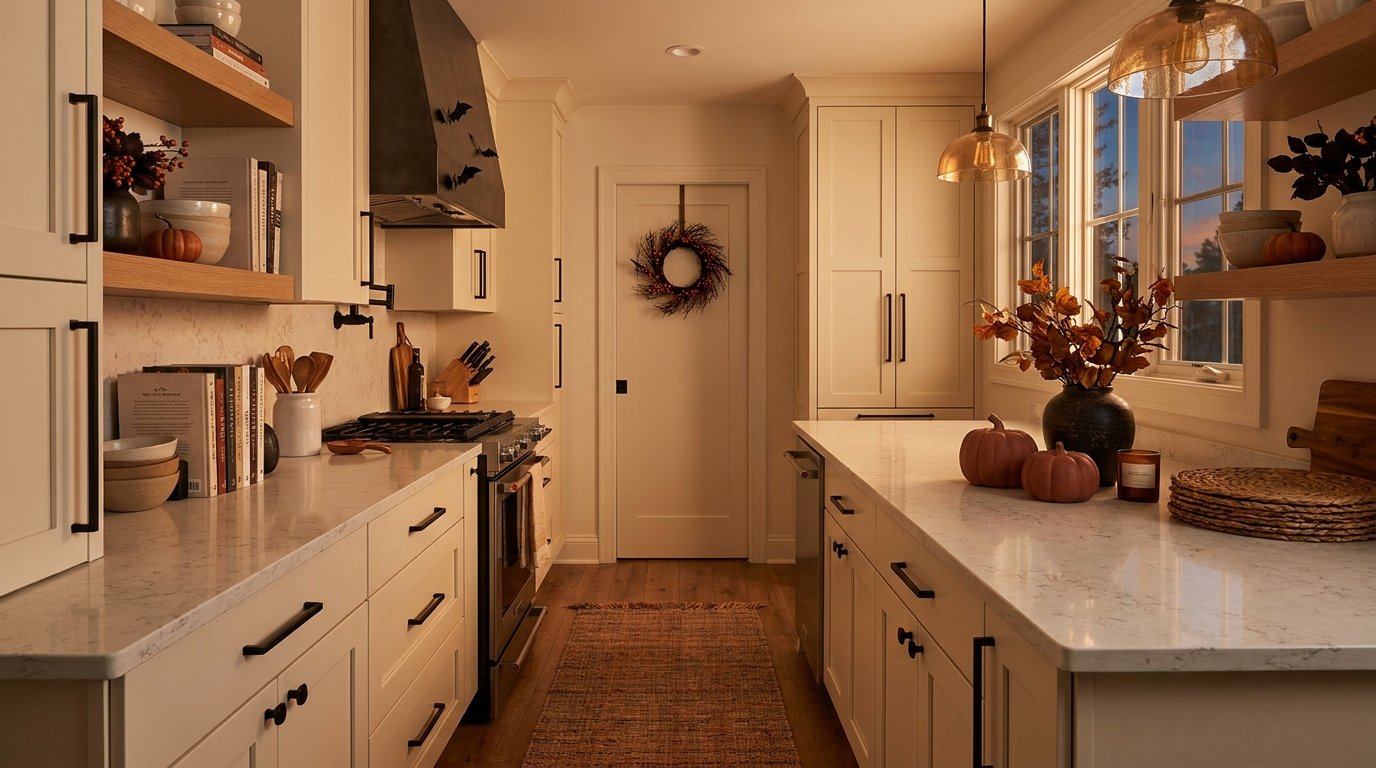
Before you buy or make anything, pick a color palette. Trust me, this one decision can stop your kitchen from looking like you grabbed every Halloween decoration from three different aisles.
Classic black and orange always works, but you have plenty of other options. You can create a softer look with cream, warm brown, muted orange, and black. You can also use deep green, burgundy, charcoal, and brass for a moodier kitchen.
IMO, warm Halloween colors work especially well in kitchens because they already pair nicely with wood cabinets, copper cookware, woven baskets, and warm lighting.
Try combinations like:
- Black + burnt orange + cream
- Charcoal + warm wood + muted orange
- Cream + black + brass
- Deep green + brown + antique gold
- White + black + soft pumpkin orange
You do not need to introduce every color. Choose two or three main shades and repeat them throughout the room.
That repetition creates a cohesive look without requiring a mountain of decorations. And fewer decorations mean more counter space. Funny how that works, right?
Decorate the Walls Instead of the Counters
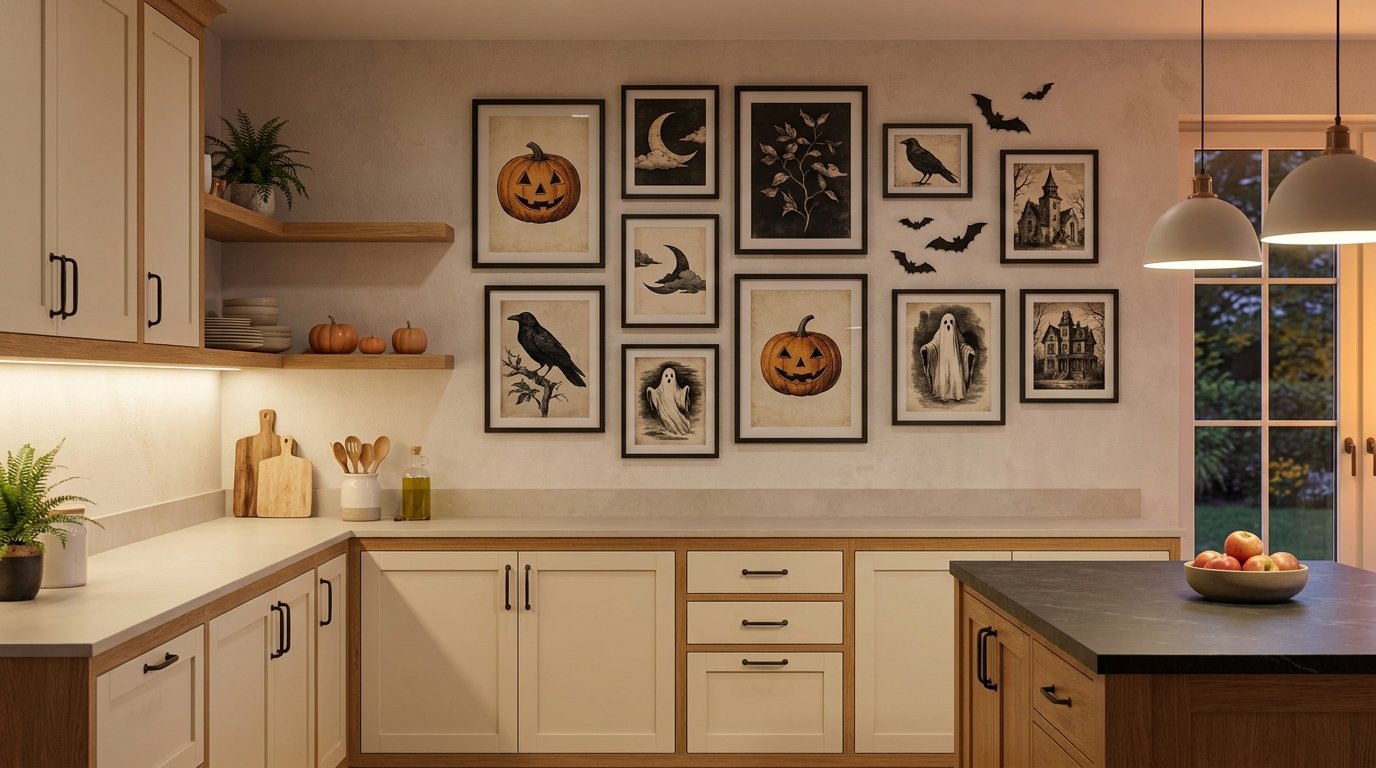
Your kitchen walls offer a ridiculous amount of unused Halloween decorating potential.
If your counters already feel crowded, stop looking at them as your main decorating surface. Look up.
A blank wall can hold framed Halloween artwork, paper bats, spooky silhouettes, seasonal prints, or a small gallery arrangement. You can also decorate the wall above a breakfast nook, dining area, coffee station, or open shelving.
Create a Simple Halloween Gallery Wall
You do not need expensive seasonal artwork. Print a few Halloween illustrations, place them inside simple black or wooden frames, and arrange them together.
Mix different sizes to make the display feel collected rather than perfectly matched.
For example, you could combine:
- A vintage-style pumpkin illustration
- A black-and-white haunted house print
- A botanical illustration with dark leaves
- A simple moon and raven print
- A small antique-looking Halloween photograph
- Keep the colors consistent so the collection feels intentional.
Wall decor gives you Halloween personality without taking up a single inch of counter space. That makes it especially useful in small kitchens.
Use Your Cabinets for Halloween Decor
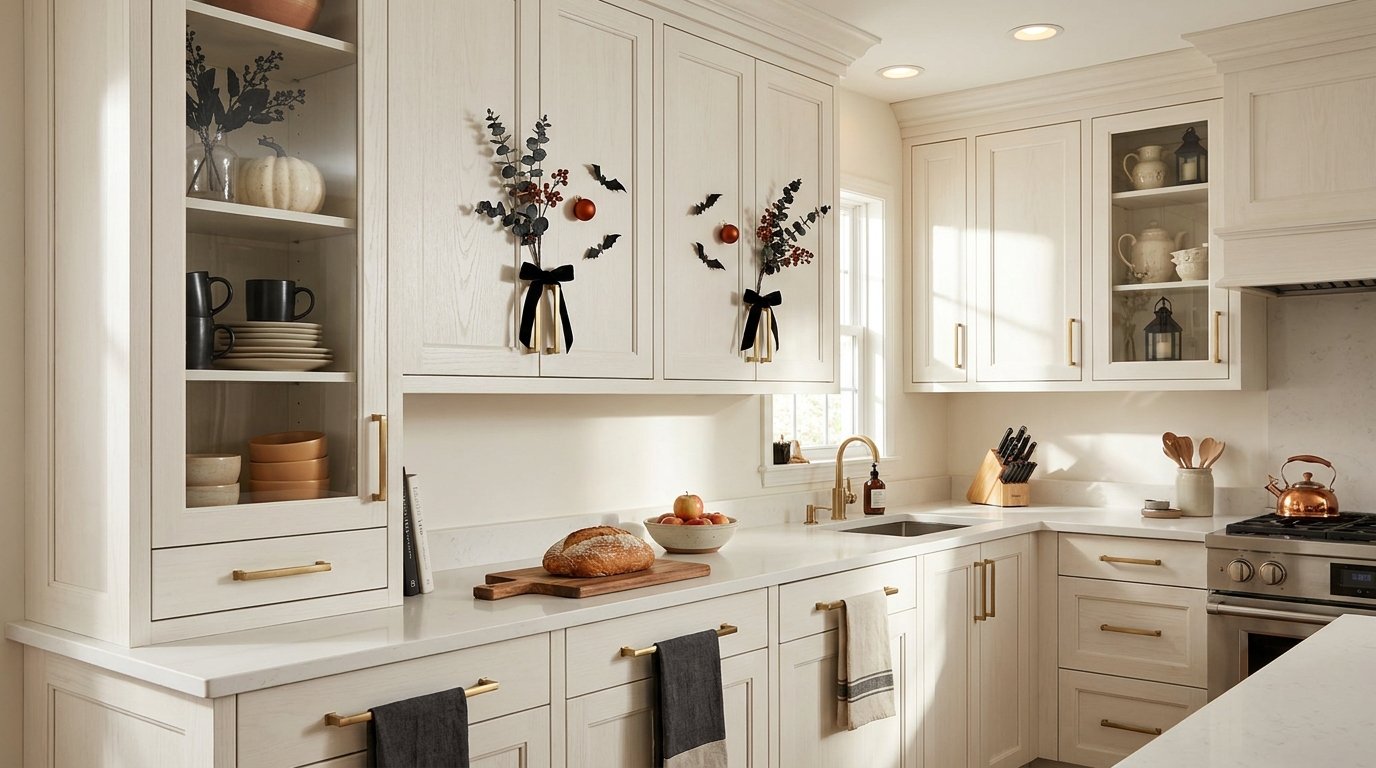
Your kitchen cabinets can do more than store plates, mugs, and the mysterious container collection nobody remembers buying.
The cabinet doors offer another easy place to add seasonal details.
Try hanging small wreaths, black ribbon, miniature bats, or lightweight Halloween ornaments from the handles. You can also attach removable decals to cabinet doors if you want something more noticeable.
Add Tiny Details to Cabinet Handles
You do not need to decorate every cabinet.
Pick a few strategically placed handles and add small details such as:
- Black velvet ribbon
- Miniature skeleton hands
- Tiny faux spiders
- Small orange bows
- Bat-shaped ornaments
- Dark eucalyptus sprigs
Keep everything lightweight so the cabinet doors still open easily.
If you have lots of cabinets, decorate only the ones around the main cooking or dining area. Your kitchen will feel festive without looking overloaded.
Decorate Glass-Front Cabinets
If your kitchen has glass-front cabinets, you have another opportunity.
Place black plates, orange mugs, dark glassware, or small Halloween-themed pieces inside the cabinets. You can also add a few paper bats to the inside of the glass.
This trick works particularly well because the decor stays inside the storage area instead of occupying your workspace.
Turn Open Shelving Into a Halloween Display
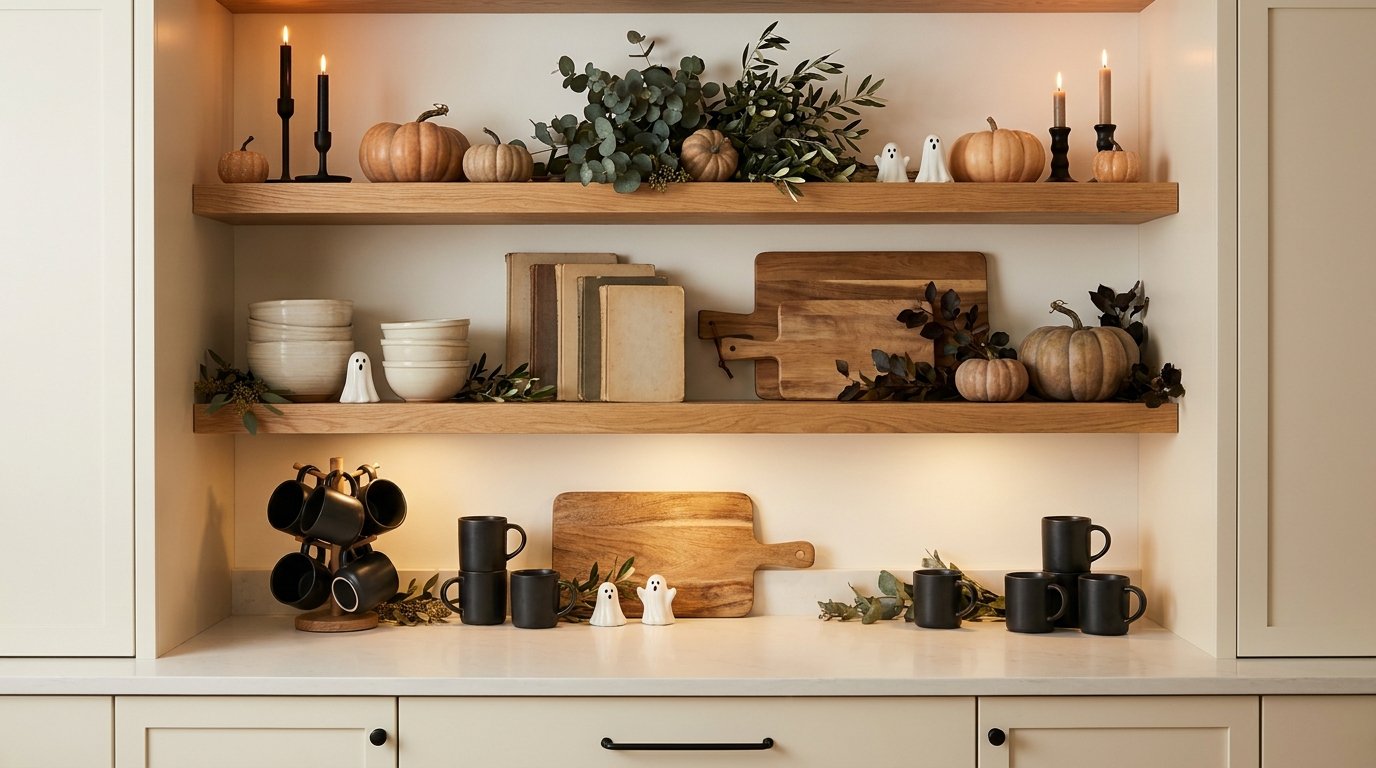
Open shelving can become the star of your Halloween kitchen.
Instead of adding decorations to the counter below the shelves, use the shelves themselves. This keeps your work surface clear while giving you plenty of room to create a seasonal display.
Start with the everyday items you already keep there. Then add a few Halloween accents between them.
You could combine:
- Matte black mugs
- Orange ceramic bowls
- Small pumpkins
- Vintage-style books
- Dark green foliage
- Black candleholders
- Wooden cutting boards
- Small ceramic ghosts
The key involves mixing Halloween decorations with functional kitchen pieces.
That approach makes the shelves look like part of the kitchen rather than a temporary Halloween display.
And please, do not put 19 tiny pumpkins on one shelf. Your kitchen does not need a pumpkin convention. 🙂
Create a Halloween Coffee Station Without Losing Counter Space
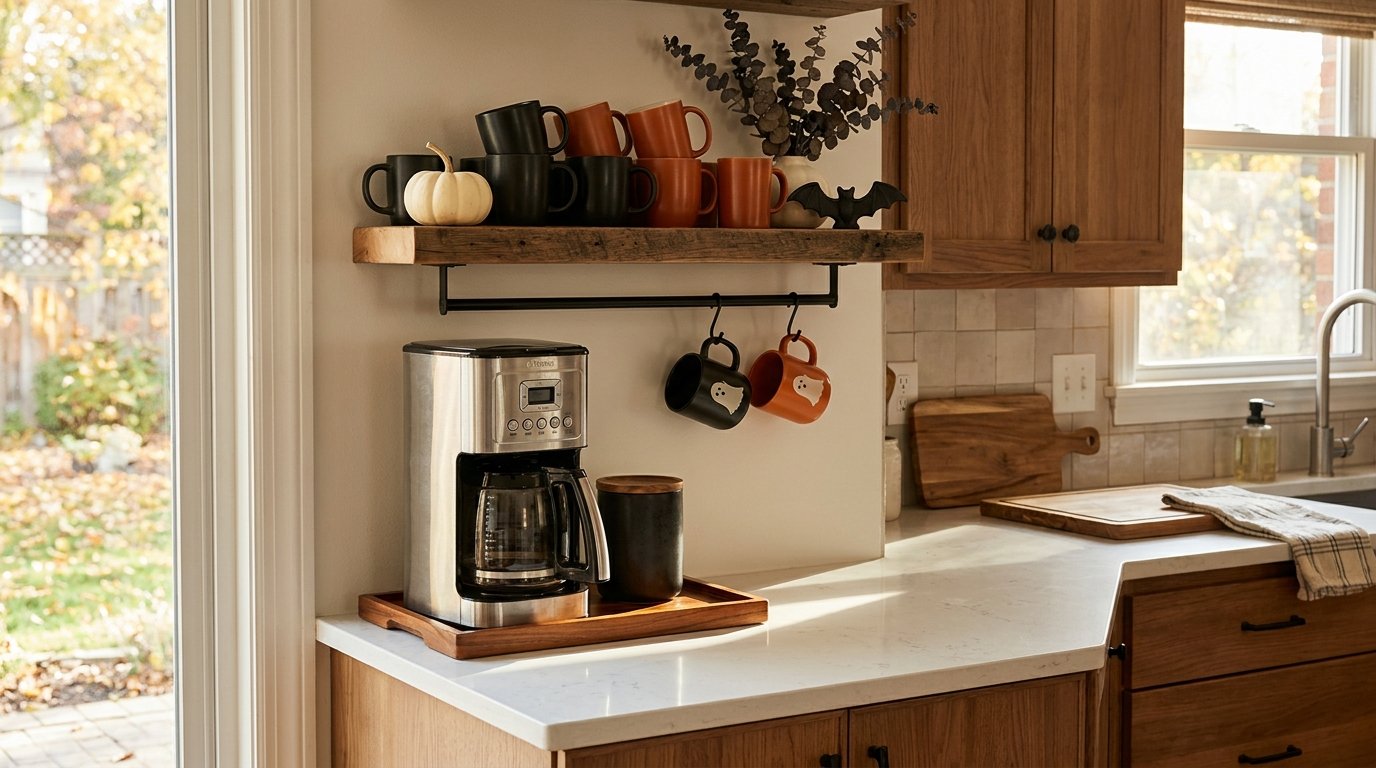
If you already have a coffee station, you can turn it into a small seasonal focal point.
The important word here involves small.
Instead of covering the entire counter with Halloween decorations, work vertically around the coffee maker. Add a small framed print behind it, hang a seasonal mug rack nearby, or place a narrow shelf above the coffee station.
You can also switch your regular mugs for Halloween-inspired ones.
Try a Vertical Coffee Station
Use the wall above your coffee maker for:
- A small black shelf
- Hanging mugs
- A framed Halloween print
- A narrow peg rail
- A small seasonal wreath
Keep the actual counter limited to the coffee maker, canister, and anything you use daily.
This setup gives you the Halloween atmosphere without forcing you to move your coffee machine every time you need to prepare breakfast.
Hang a Halloween Wreath Somewhere Unexpected
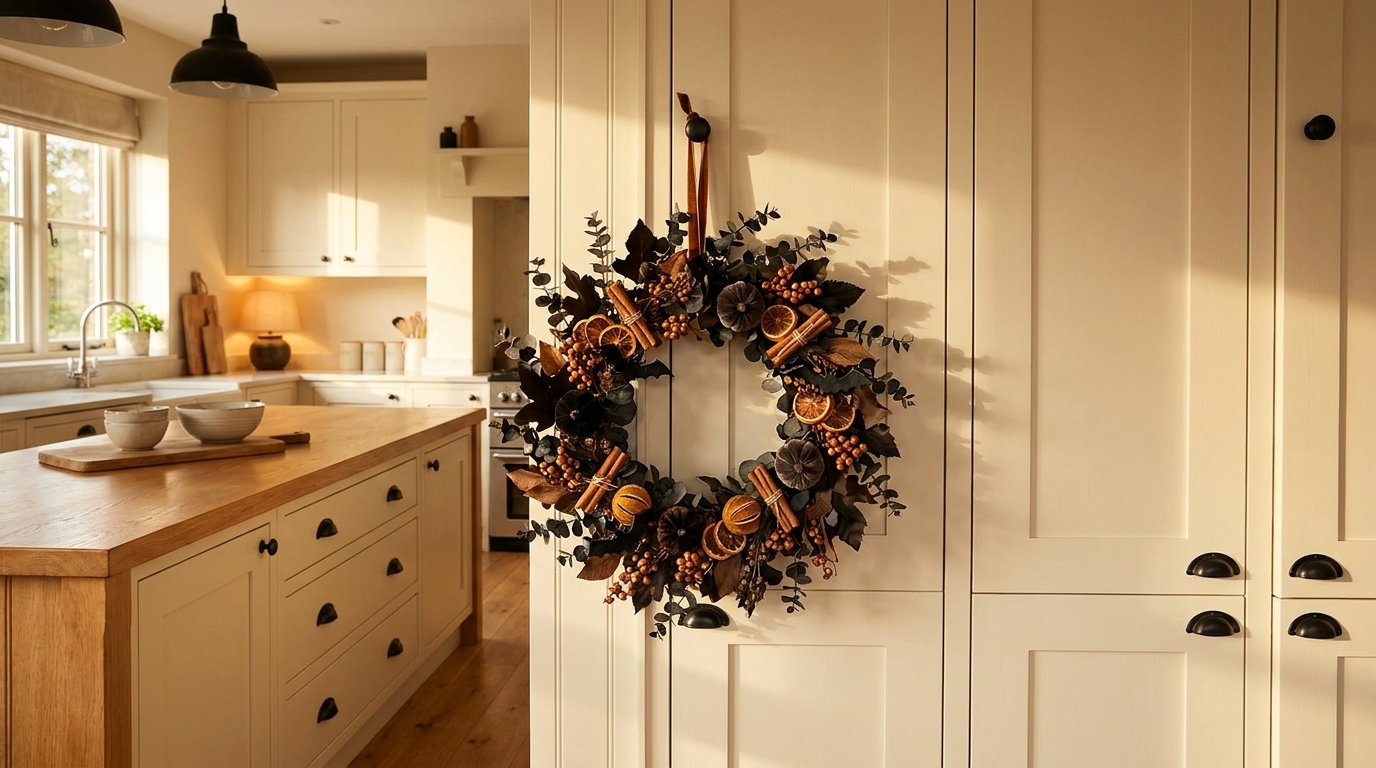
Everyone expects a Halloween wreath on the front door.
Your kitchen does not have to follow the rules.
A small wreath can work beautifully on a pantry door, cabinet wall, window, or interior doorway. Choose a lightweight design that fits your kitchen’s color palette.
For a cozy kitchen, try a wreath with dried orange slices, dark foliage, cinnamon sticks, and small black accents.
For a spooky kitchen, use black branches, faux cobwebs, miniature bats, and dark flowers.
You can also make a simple DIY Halloween wreath using materials you already own.
Hanging a wreath gives you a large visual impact without taking up valuable horizontal space.
That makes it one of my favorite solutions for small kitchens.
Use the Kitchen Windows
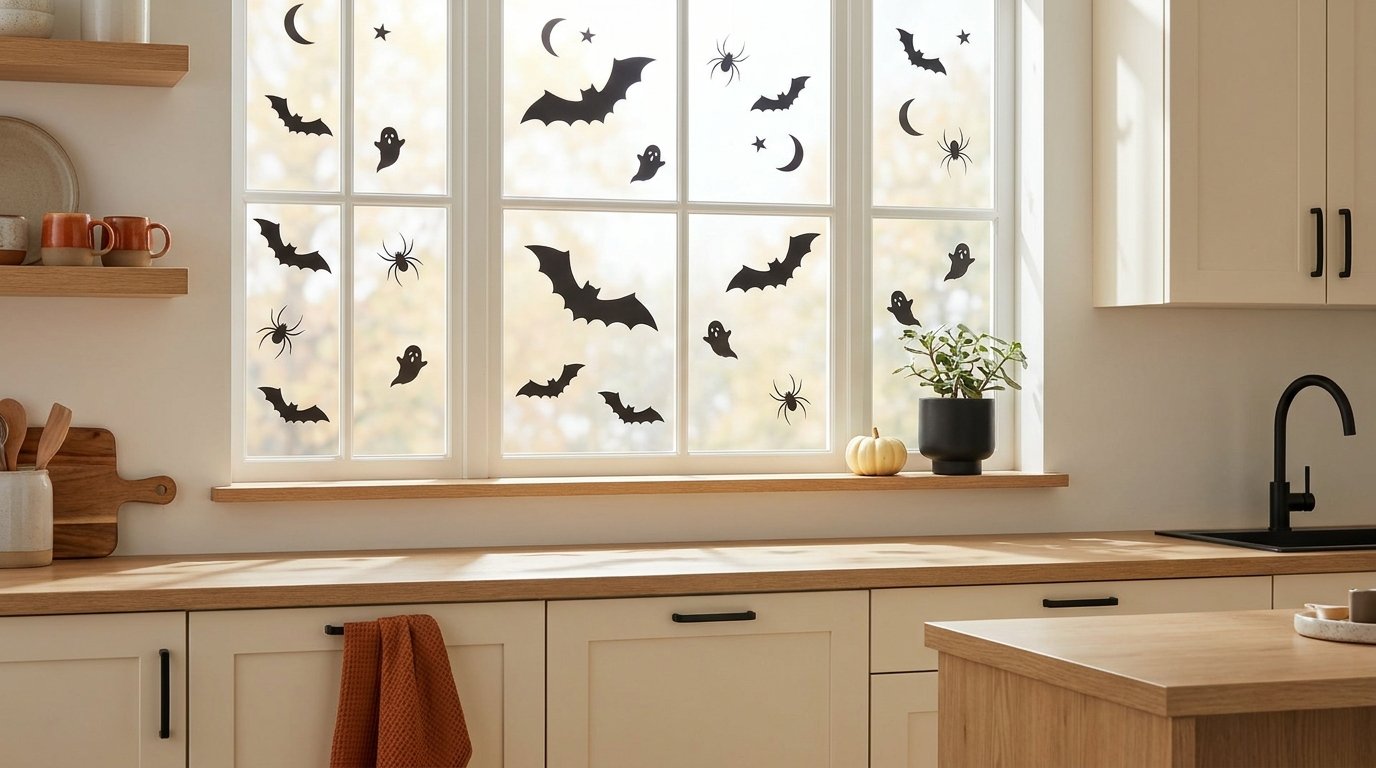
Kitchen windows often sit completely empty during Halloween.
Why?
You already have a built-in decorating surface right there.
Add removable window clings, hanging paper bats, small faux spiders, or a simple garland around the frame. You can also place a few lightweight decorations on the windowsill if you have one.
If you want a subtle look, use black silhouettes against the glass. A moon, bats, branches, and a few tiny birds can create a spooky effect without looking childish.
For a more playful kitchen, use pumpkin faces or ghost shapes.
Keep Window Decor Away From Heat
If your window sits above a stove or another heat-producing appliance, choose your materials carefully.
Keep paper, fabric, dried foliage, and other flammable materials away from heat sources. Also avoid placing decorations where they can interfere with ventilation.
A cute Halloween kitchen should never create a safety problem.
FYI, you can get plenty of spooky impact from removable window decorations without putting anything near your cooking area.
Style the Refrigerator Without Losing Space
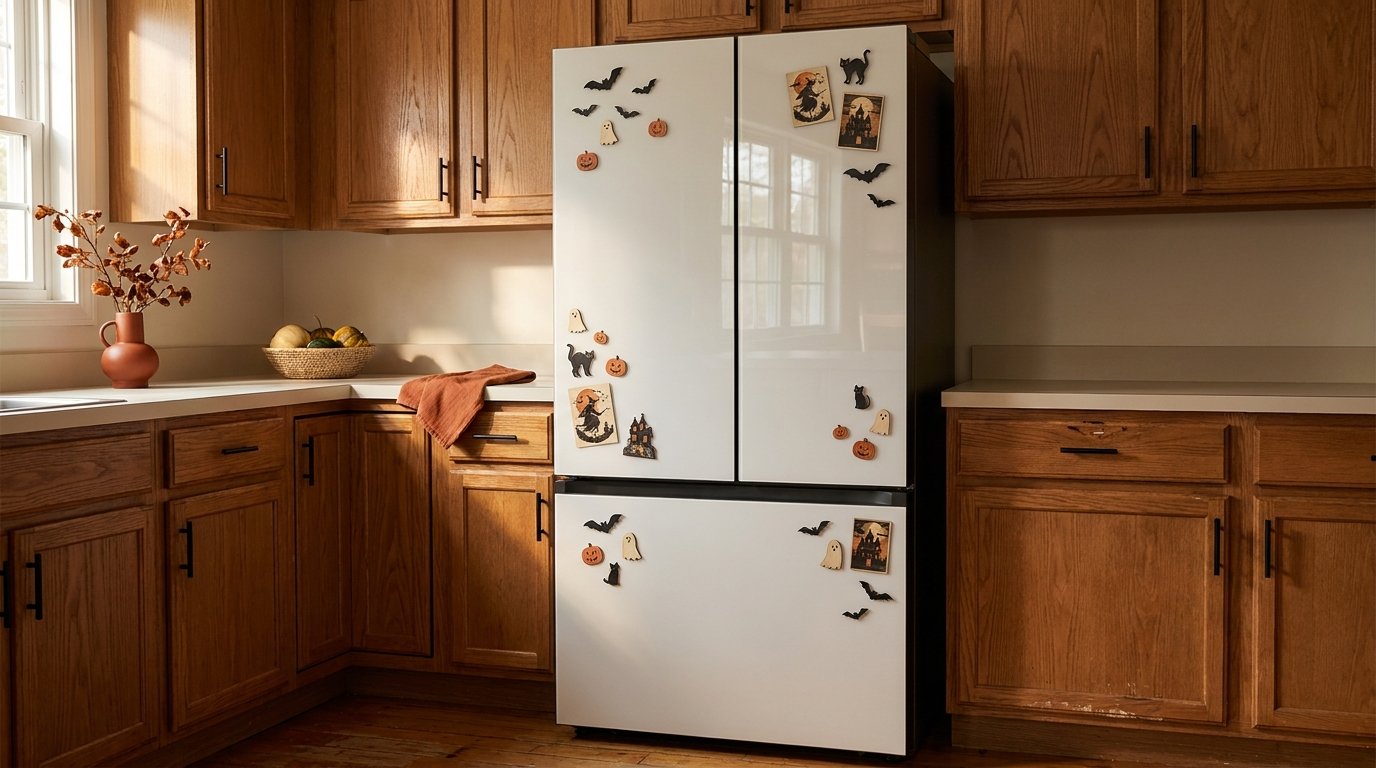
Your refrigerator provides another huge decorating opportunity.
You can use removable Halloween magnets, small magnetic signs, black bat shapes, or a simple seasonal message.
If your refrigerator has a large blank side panel, you can decorate that area instead of the front. That option works especially well when you want the kitchen to feel festive without making the main visual areas too busy.
You can also use the refrigerator side for a small Halloween display featuring:
- Magnetic pumpkins
- Black cats
- Bats
- Ghosts
- Vintage Halloween illustrations
- Seasonal grocery lists
Keep the design controlled.
If you cover every square inch with decorations, the refrigerator starts looking less spooky and more like it lost a battle with a craft store.
Add Halloween Textiles Instead of More Decor
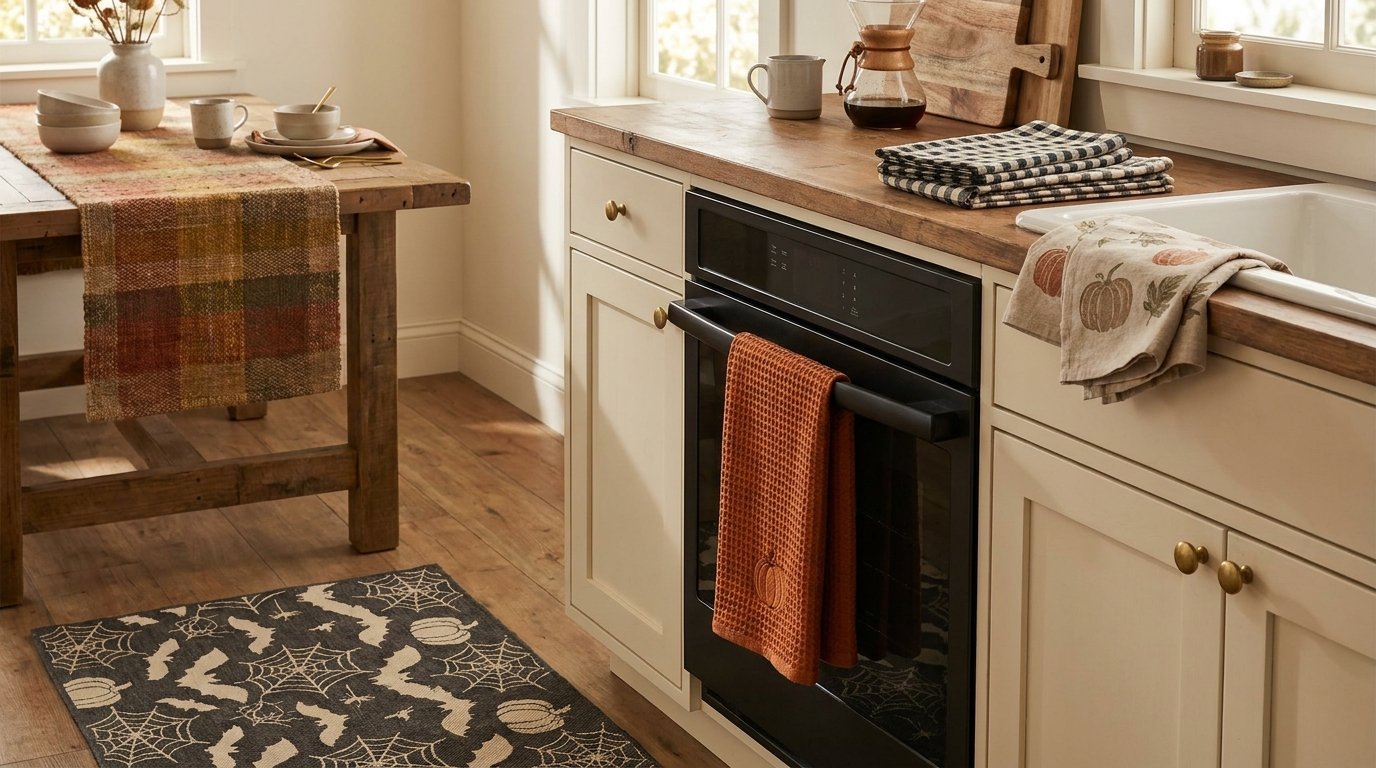
Want an easy Halloween makeover with almost no clutter?
Change your textiles.
Seasonal towels, runners, potholders, curtains, and washable mats can completely change the mood of your kitchen without adding much physical clutter.
Look for patterns featuring:
- Pumpkins
- Black cats
- Bats
- Vintage Halloween illustrations
- Plaid
- Black-and-white stripes
- Muted orange
- Dark florals
You can also choose plain textiles in Halloween colors if you prefer a more sophisticated look.
For example, a burnt-orange kitchen towel paired with black linen napkins can create a seasonal feeling without screaming Halloween from across the street.
And when October ends, you simply swap the textiles back.
Use a Narrow Counter Display Instead of a Large One
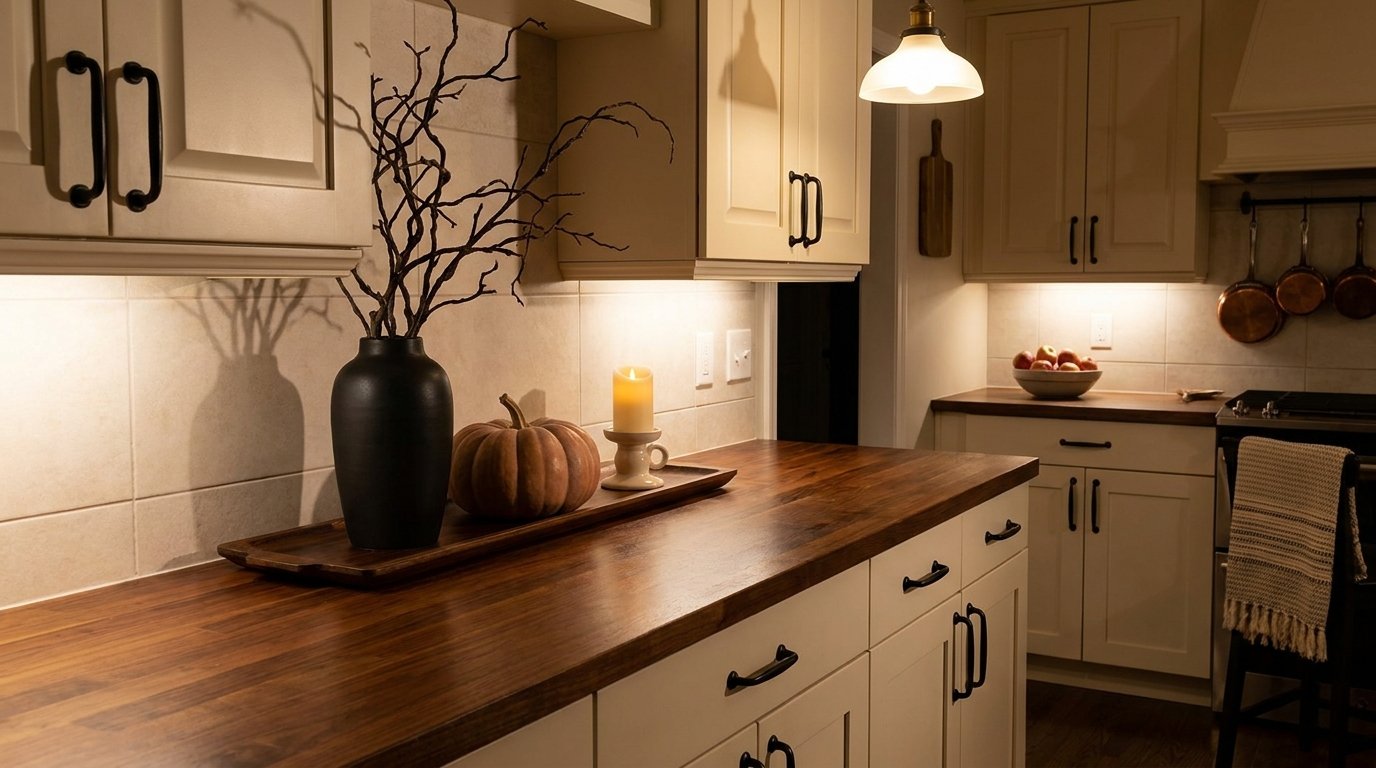
If you really want Halloween decorations on the counter, create one small display rather than scattering objects everywhere.
Choose one narrow area and build a compact vignette.
A simple arrangement might include:
- One medium pumpkin
- One small black vase
- A few dark branches
- One candle
- A tiny decorative ghost
Keep the display close to the backsplash so you preserve the front section of the counter for food preparation.
Follow the Three-Item Rule
A simple trick can help prevent clutter.
Choose three main pieces with different heights.
For example:
- Tall: black branches in a vase
- Medium: small pumpkin
- Low: candle or tiny ceramic ghost
The height variation creates visual interest without requiring more objects.
You can also use a tray to keep the display contained. When you need the counter, simply move the entire tray somewhere else.
Decorate the Dining Area Instead
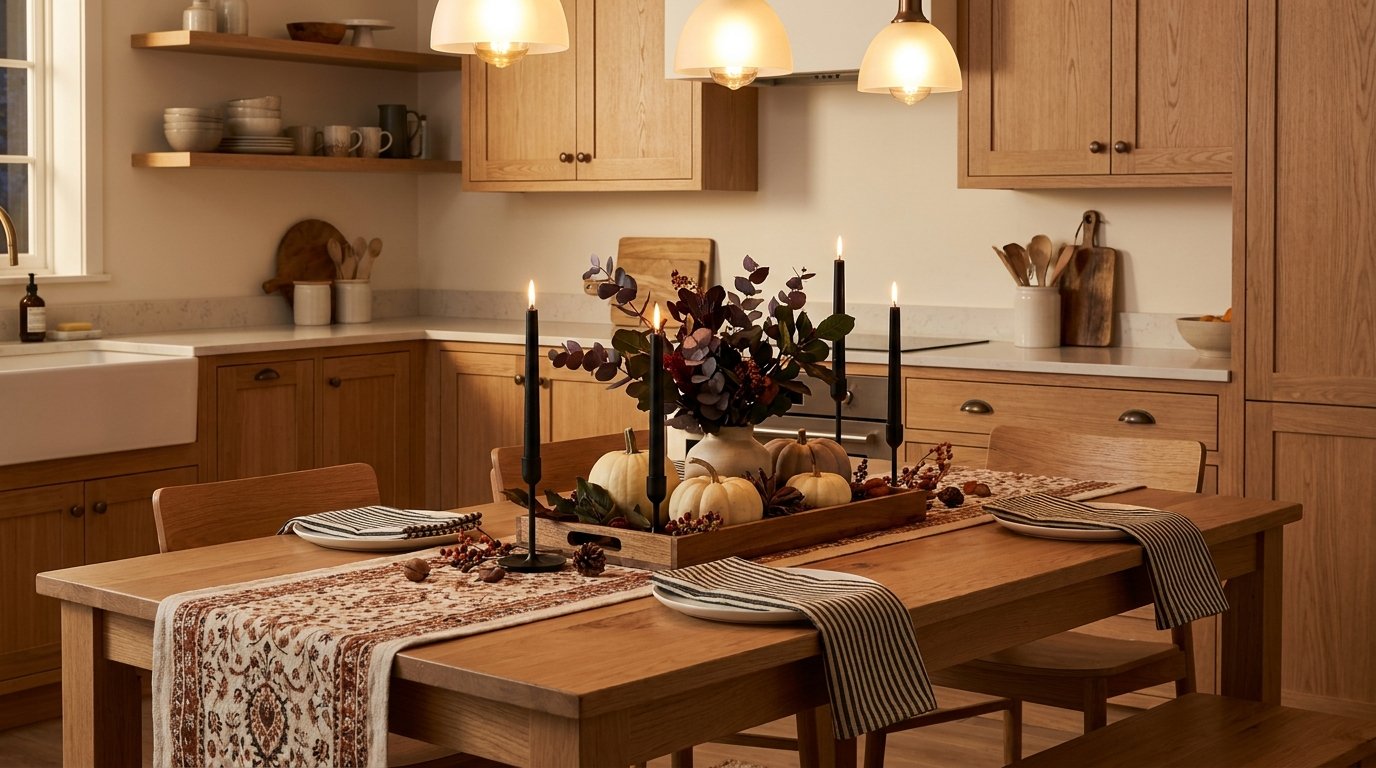
If your kitchen connects directly to a dining area, you do not need to force every Halloween decoration into the kitchen itself.
Move some of the seasonal styling into the dining zone.
A small centerpiece, Halloween-themed napkins, black candlesticks, or a seasonal table runner can extend the Halloween theme without adding anything to your kitchen counters.
This strategy also creates better visual flow between the spaces.
Create a Simple Halloween Table Centerpiece
Start with a wooden tray or shallow bowl.
Add a few pumpkins, dark foliage, and one or two candles. Keep the centerpiece low enough that people can still see across the table.
For a more natural look, use small white pumpkins, dried branches, pinecones, and warm brown accents.
For a spooky look, add black candles, faux ravens, dark flowers, and miniature skulls.
You do not need a giant centerpiece to make the table feel seasonal.
In fact, smaller arrangements usually look more elegant and make dinner much easier.
Make Use of the Space Above Your Cabinets
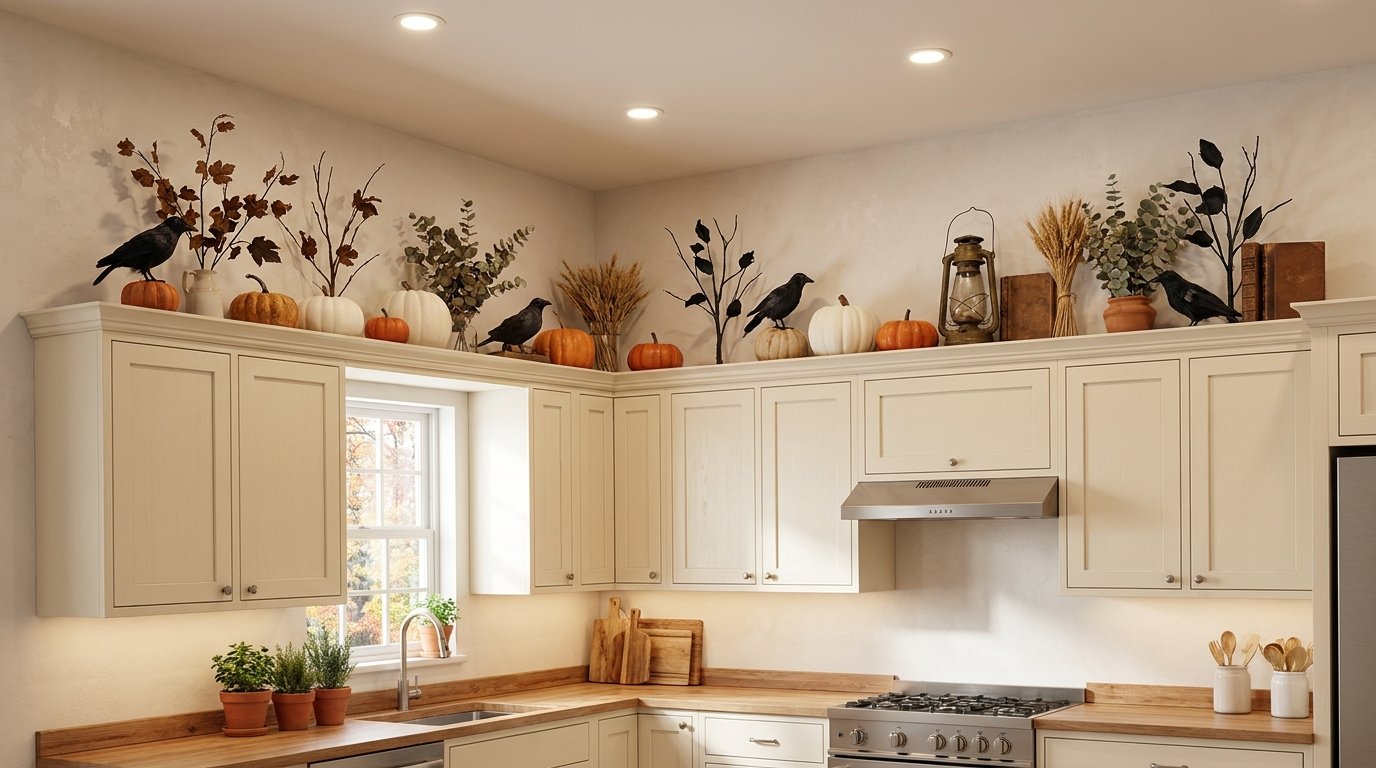
If your kitchen has cabinets that stop below the ceiling, you have another decorating zone.
This space can hold larger Halloween decorations without interfering with cooking or food preparation.
Try placing a few larger pieces across the top, such as:
- Faux black branches
- Vintage-style Halloween signs
- Large pumpkins
- Witches’ hats
- Dark baskets
- Faux crows
- Dried foliage
Keep the arrangement balanced instead of filling every inch.
If you already have everyday decor above the cabinets, remove a few pieces and replace them with Halloween accents. That approach keeps the area from becoming visually chaotic.
And yes, climbing onto a chair to reach the top of your cabinets probably counts as an adventure. Please use a proper step stool instead.
Create a Halloween Pantry or Beverage Nook
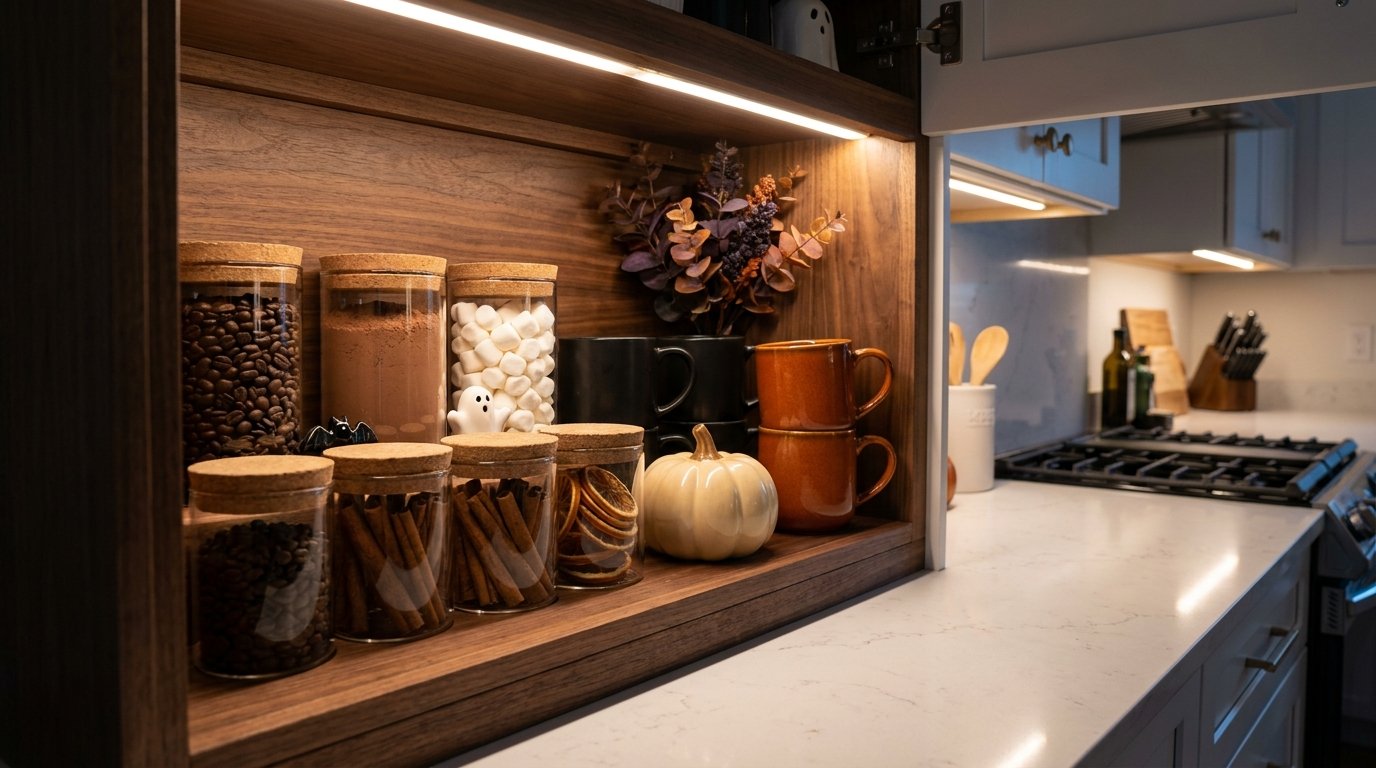
A small pantry area can become a seasonal feature without affecting your main kitchen workspace.
Group Halloween mugs, napkins, snacks, jars, and small decorations inside one cabinet or on one shelf.
You can even create a little Halloween drink station with hot chocolate, coffee syrups, seasonal mugs, and cinnamon.
Use matching containers if you want a cleaner look.
For example, black labels and glass jars can create a moody Halloween aesthetic without requiring much decor at all.
The best part?
The entire display stays contained in one area.
That makes cleanup much easier when Halloween ends.
Use Removable Decorations
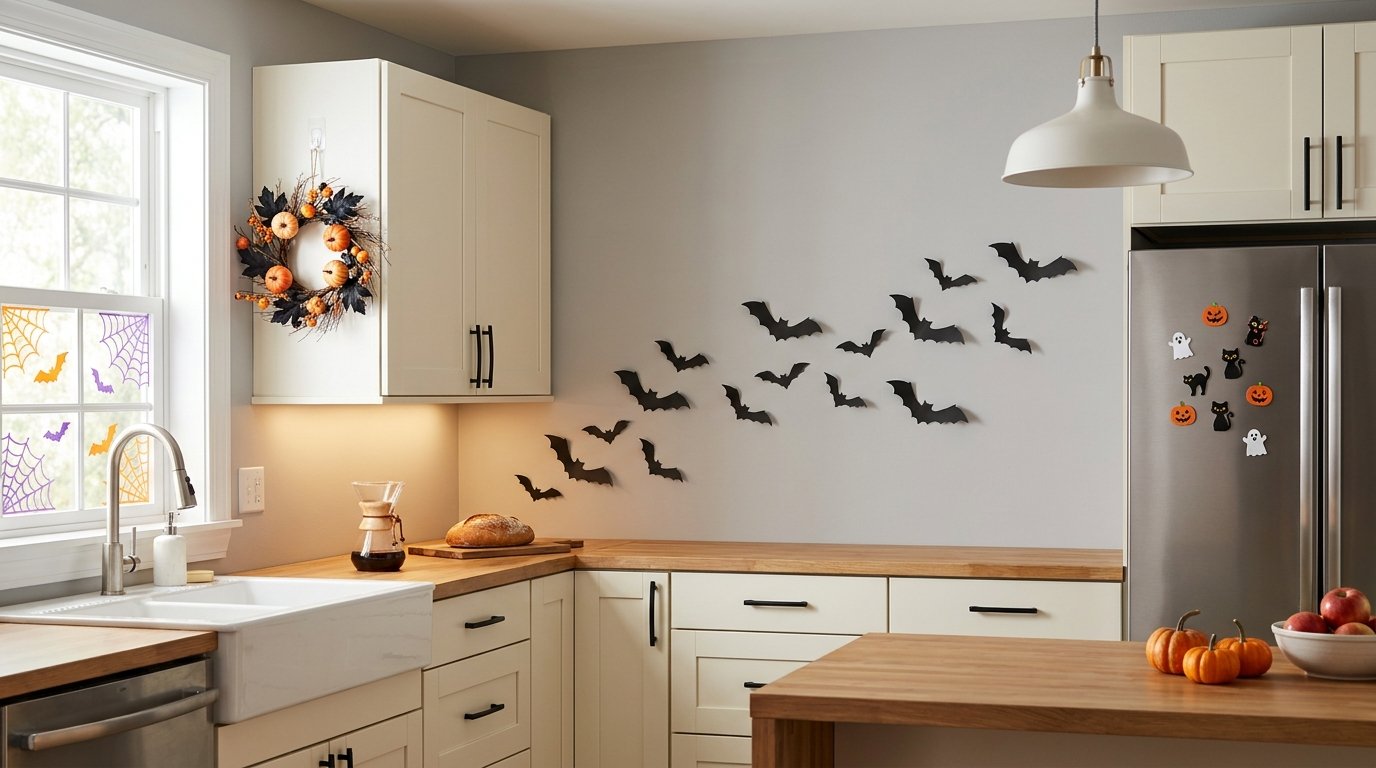
If you rent your home or simply do not want to damage your kitchen, removable decorations make sense.
Use removable hooks, temporary decals, magnetic pieces, and lightweight hanging decorations.
Before attaching anything, check the manufacturer’s instructions and make sure the surface can handle the product.
Avoid putting adhesives directly on delicate finishes without testing them first.
Good Places for Removable Decor
Consider:
- Cabinet doors
- Refrigerator surfaces
- Windows
- Pantry doors
- Interior doors
- Backsplash areas
- Empty wall sections
Removable decor lets you experiment without committing to anything permanent.
And honestly, Halloween gives you a pretty good excuse to go slightly dramatic for a month.
Bring in Halloween Lighting
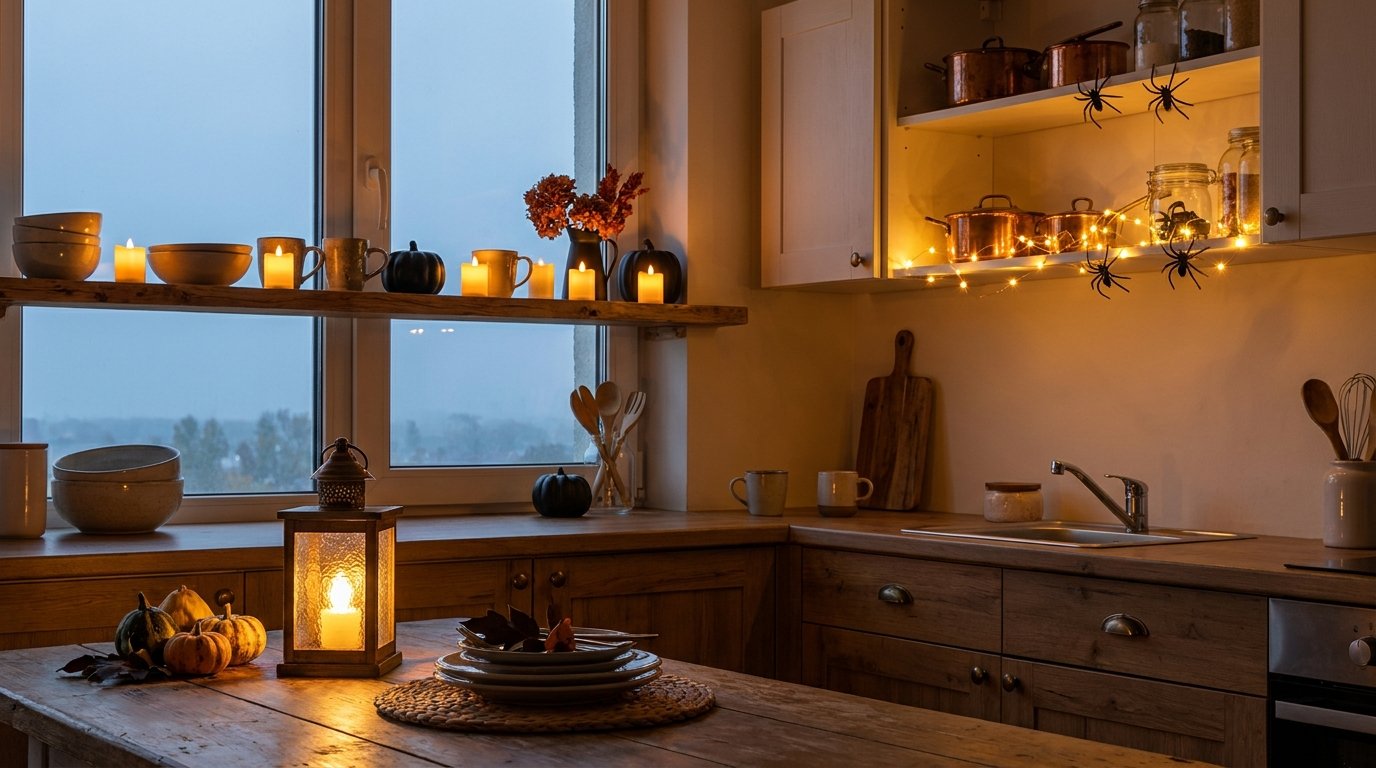
Lighting can change the entire atmosphere of a kitchen.
You do not need to install new fixtures or cover the room in string lights. A few small lighting changes can create a much warmer Halloween mood.
Try warm LED candles, battery-powered lanterns, or small fairy lights.
Place them on shelves, inside glass-front cabinets, or around a dining area.
Choose Warm Light
Warm lighting generally creates a cozier atmosphere than harsh cool-white lighting.
For Halloween, that warmer glow works particularly well with:
- Black decor
- Orange pumpkins
- Wood
- Brass
- Dark green
- Cream ceramics
Use battery-powered candles when you want candlelight without an open flame.
Keep all decorative lighting away from water, heat, and areas where you prepare food.
Make One Halloween Focal Point
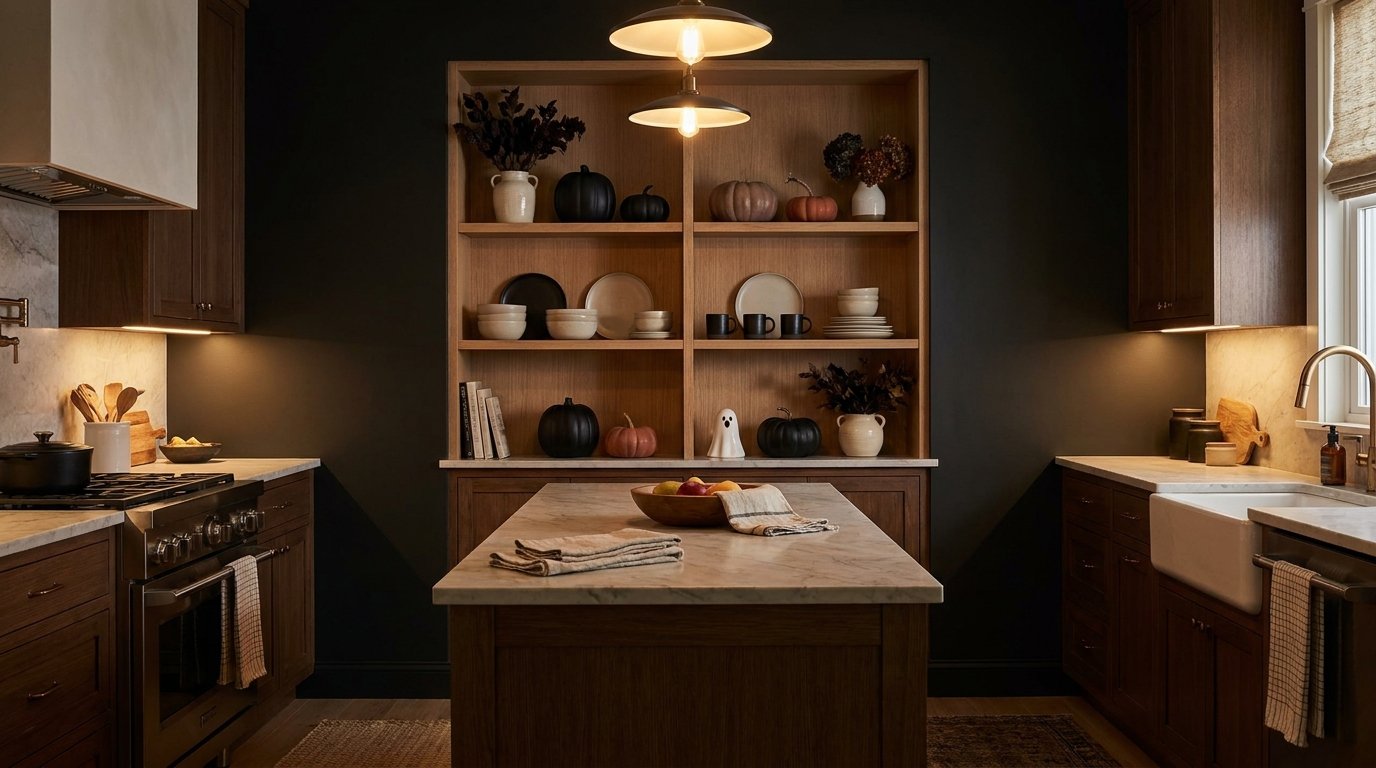
Here comes the biggest tip of the entire article: you do not need to decorate everything.
Pick one area that gets most of your Halloween attention.
Maybe that area includes your open shelves. Maybe you choose the kitchen window. Maybe you decorate the dining table.
Once you choose your focal point, keep the surrounding areas relatively simple.
This technique makes the room feel intentional instead of cluttered.
Think of your kitchen like an outfit. If every piece screams for attention, nothing actually stands out.
What to Remove Before Adding Halloween Decor
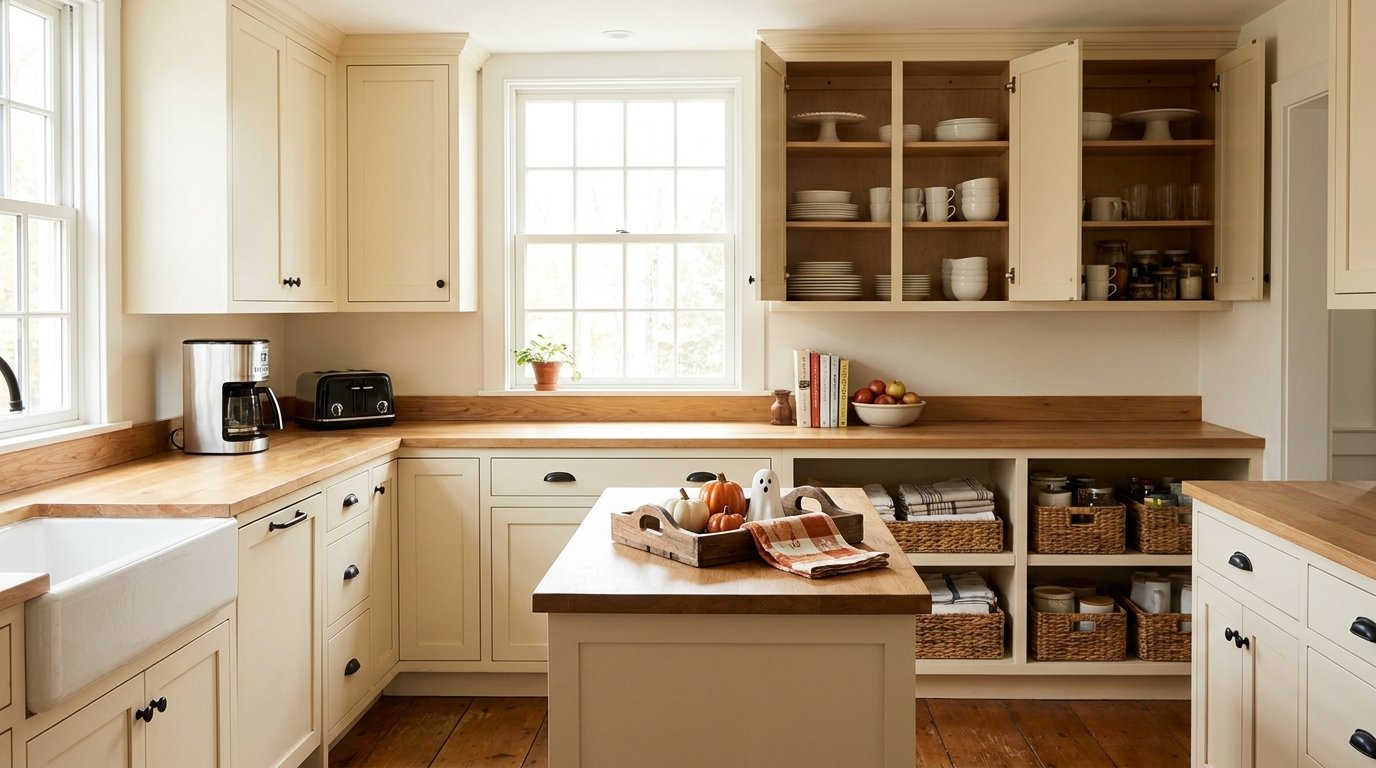
This step sounds boring, but it can completely change the result.
Before decorating, look around your kitchen and remove anything you do not need on display.
Put away:
- Extra appliances
- Unused containers
- Random mail
- Decorative clutter
- Excess kitchen tools
- Everyday pieces that clash with your Halloween palette
You do not need to create empty counters everywhere.
You simply need enough breathing room for your seasonal decorations to stand out.
Decluttering first often creates more visual impact than buying more decorations.
That also saves money, which gives you an excellent excuse to spend the budget on pumpkins instead. Priorities, obviously.
Halloween Kitchen Decor Ideas for Small Kitchens
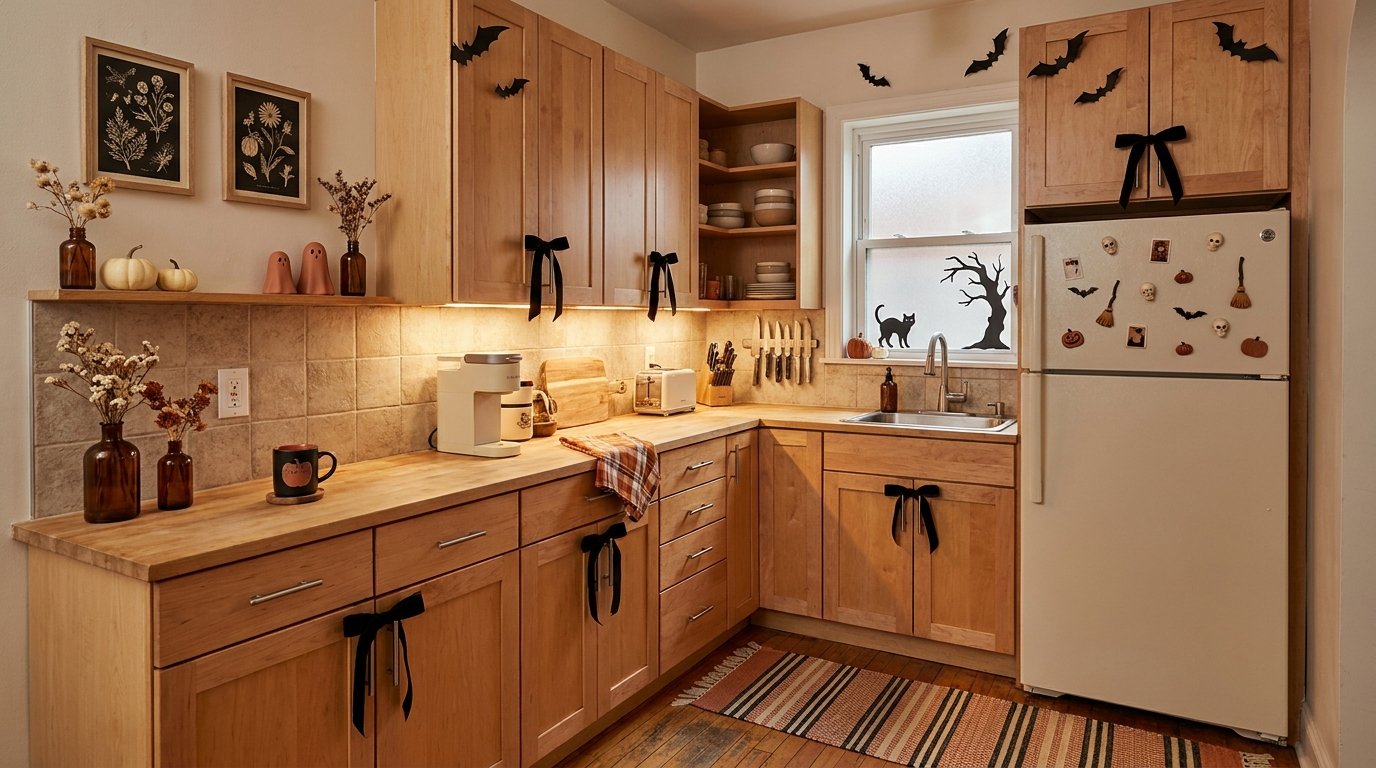
Small kitchens need a slightly different strategy.
When every counter has a job, horizontal decorations quickly become annoying.
Focus on vertical surfaces and temporary seasonal swaps.
Use:
- Wall art
- Cabinet decorations
- Hanging wreaths
- Window silhouettes
- Refrigerator magnets
- Open shelving
- Above-cabinet decor
- Seasonal textiles
- Small lighting accents
You can also swap ordinary kitchen items for Halloween-colored alternatives.
Replace your everyday dish towels with black or burnt-orange ones. Switch your regular mugs for seasonal designs. Add a dark runner to the dining table.
These changes can make a small kitchen feel completely different without adding clutter.
How to Keep Your Halloween Kitchen Functional
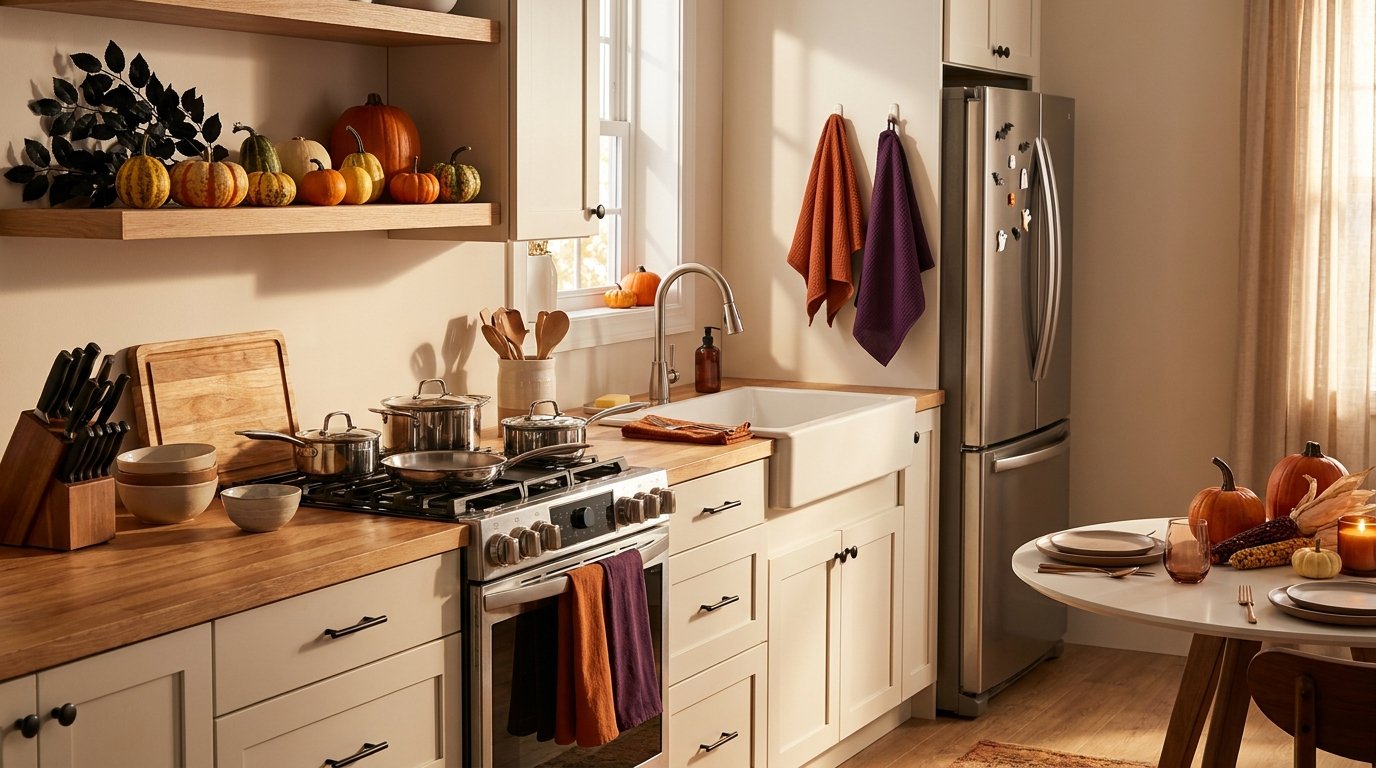
A beautiful kitchen still needs to function as a kitchen.
Before you place any decoration, ask yourself one question: Will I have to move this every time I cook?
If the answer involves yes, reconsider the location.
Keep frequently used areas clear, especially around your stove, sink, cutting boards, and coffee maker.
Also avoid placing loose decorations near food preparation areas. Small objects, faux cobwebs, glitter, and food preparation do not make particularly good roommates.
Create clear zones instead:
- Cooking zone: Keep it mostly clear.
- Coffee zone: Add a small seasonal display.
- Decor zone: Use shelves or a designated counter section.
- Dining zone: Add your larger seasonal centerpiece.
- Wall zone: Use artwork and hanging decorations.
This setup lets you enjoy the Halloween aesthetic without constantly rearranging your kitchen.
Budget-Friendly Halloween Kitchen Makeover Ideas
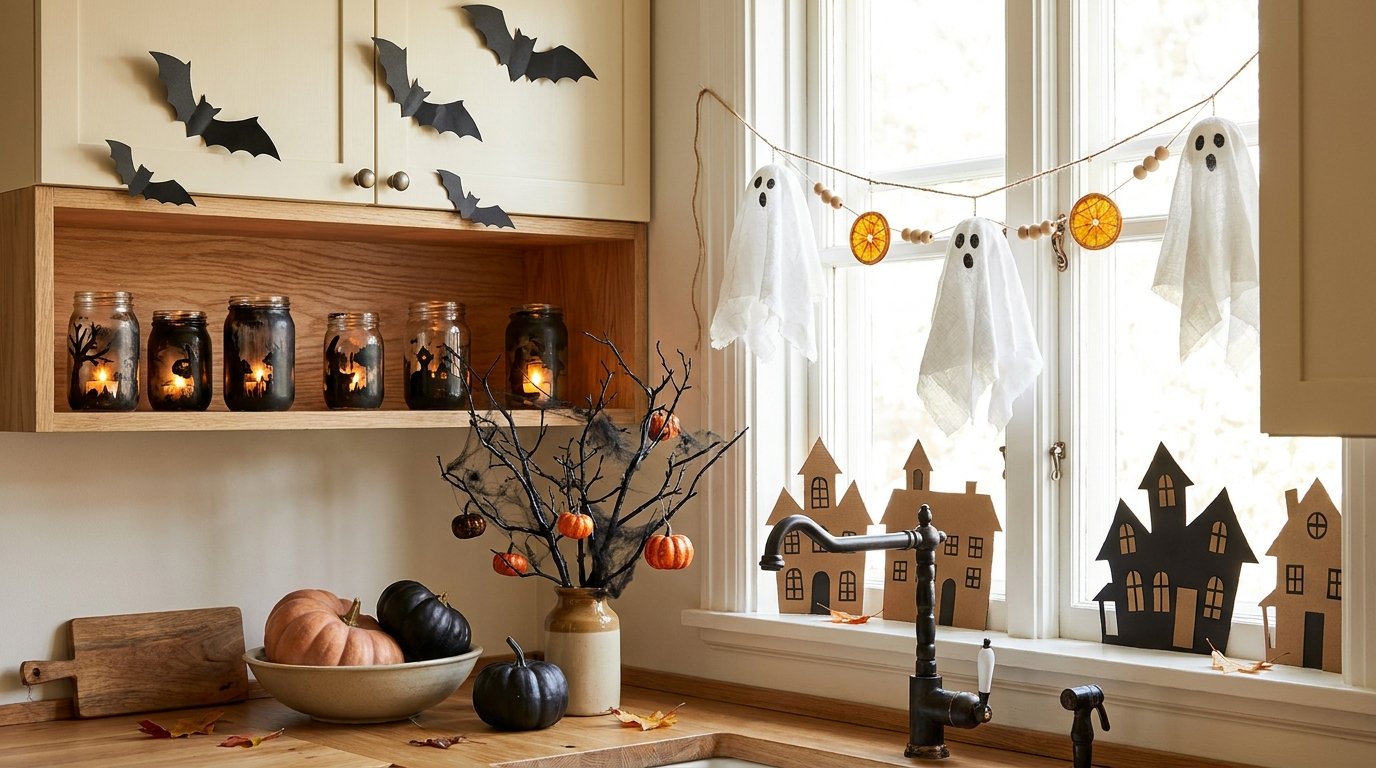
You absolutely do not need to spend a fortune.
In fact, some of the best Halloween kitchen decorations cost very little.
Try making:
- Paper bats
- Cardboard haunted houses
- Painted glass jars
- DIY pumpkins
- Fabric ghosts
- Paper garlands
- Black branch arrangements
- Simple Halloween artwork
You can also repurpose things you already own.
A black vase can become Halloween decor with a few branches. A wooden tray can hold pumpkins. Ordinary glass jars can become spooky lanterns.
Before buying something new, look around your house and ask what you can transform.
You might already own half the ingredients for a great Halloween display.
Final Thoughts
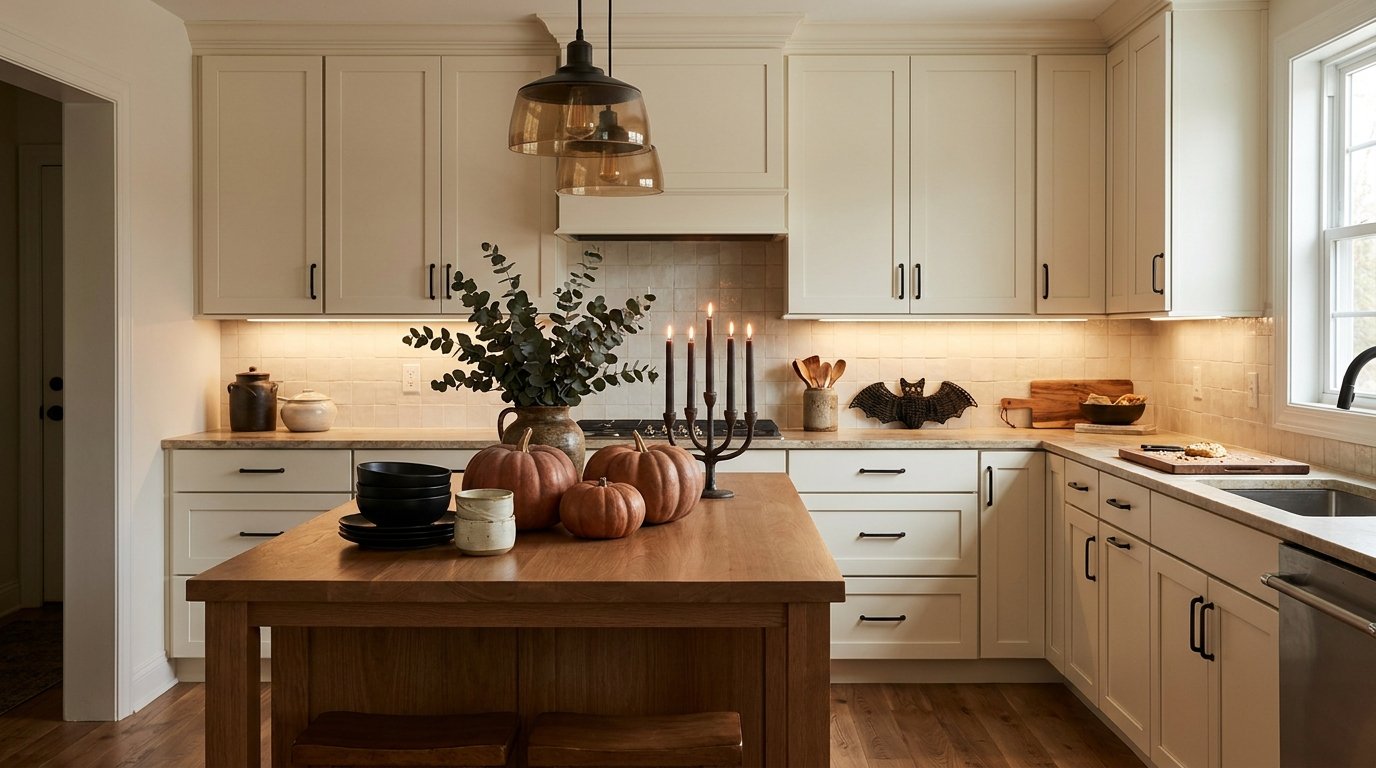
Giving your kitchen a Halloween makeover does not mean covering every available surface with pumpkins, spiders, and orange decorations.
The smartest approach involves using vertical space, decorating cabinets and shelves, switching textiles, adding seasonal lighting, and creating one or two intentional focal points.
Keep your counters functional. Keep your decorations contained. Most importantly, choose pieces that actually fit the style of your kitchen.
A little Halloween personality can go a surprisingly long way.
So grab a few pumpkins, hang those bats, swap those towels, and leave your coffee maker exactly where it belongs. Your kitchen can look spooky without making breakfast feel like an obstacle course.